Herby, saucy, and oh-so-delicious, this Hariyali chicken curry aka Hara Masala Chicken and Green Chicken Curry, is one dish you’ll want to make on repeat. With just 10 minutes of hands-on time, it’s one of the easiest weeknight dinners you could ever make!
This curry is such a hit with family and friends that I even replicated the sauce for another green chicken recipe, my Hariyali chicken tikka skewers.

WANT TO SAVE THIS RECIPE?
We’re a family of curry lovers, and if you’ve been following the blog for some time, you know that already. My cauliflower cashew curry has become a staple, and my egg curry is hearty, wholesome, and perfect for days when I’m just looking to put something together super quickly.
This time, I wanted to try my hand at another quick curry recipe- something my mom made mostly for dinner parties but that came together in under 30 minutes. Perfect to share here seeing how you love quick and easy weeknight dinners.
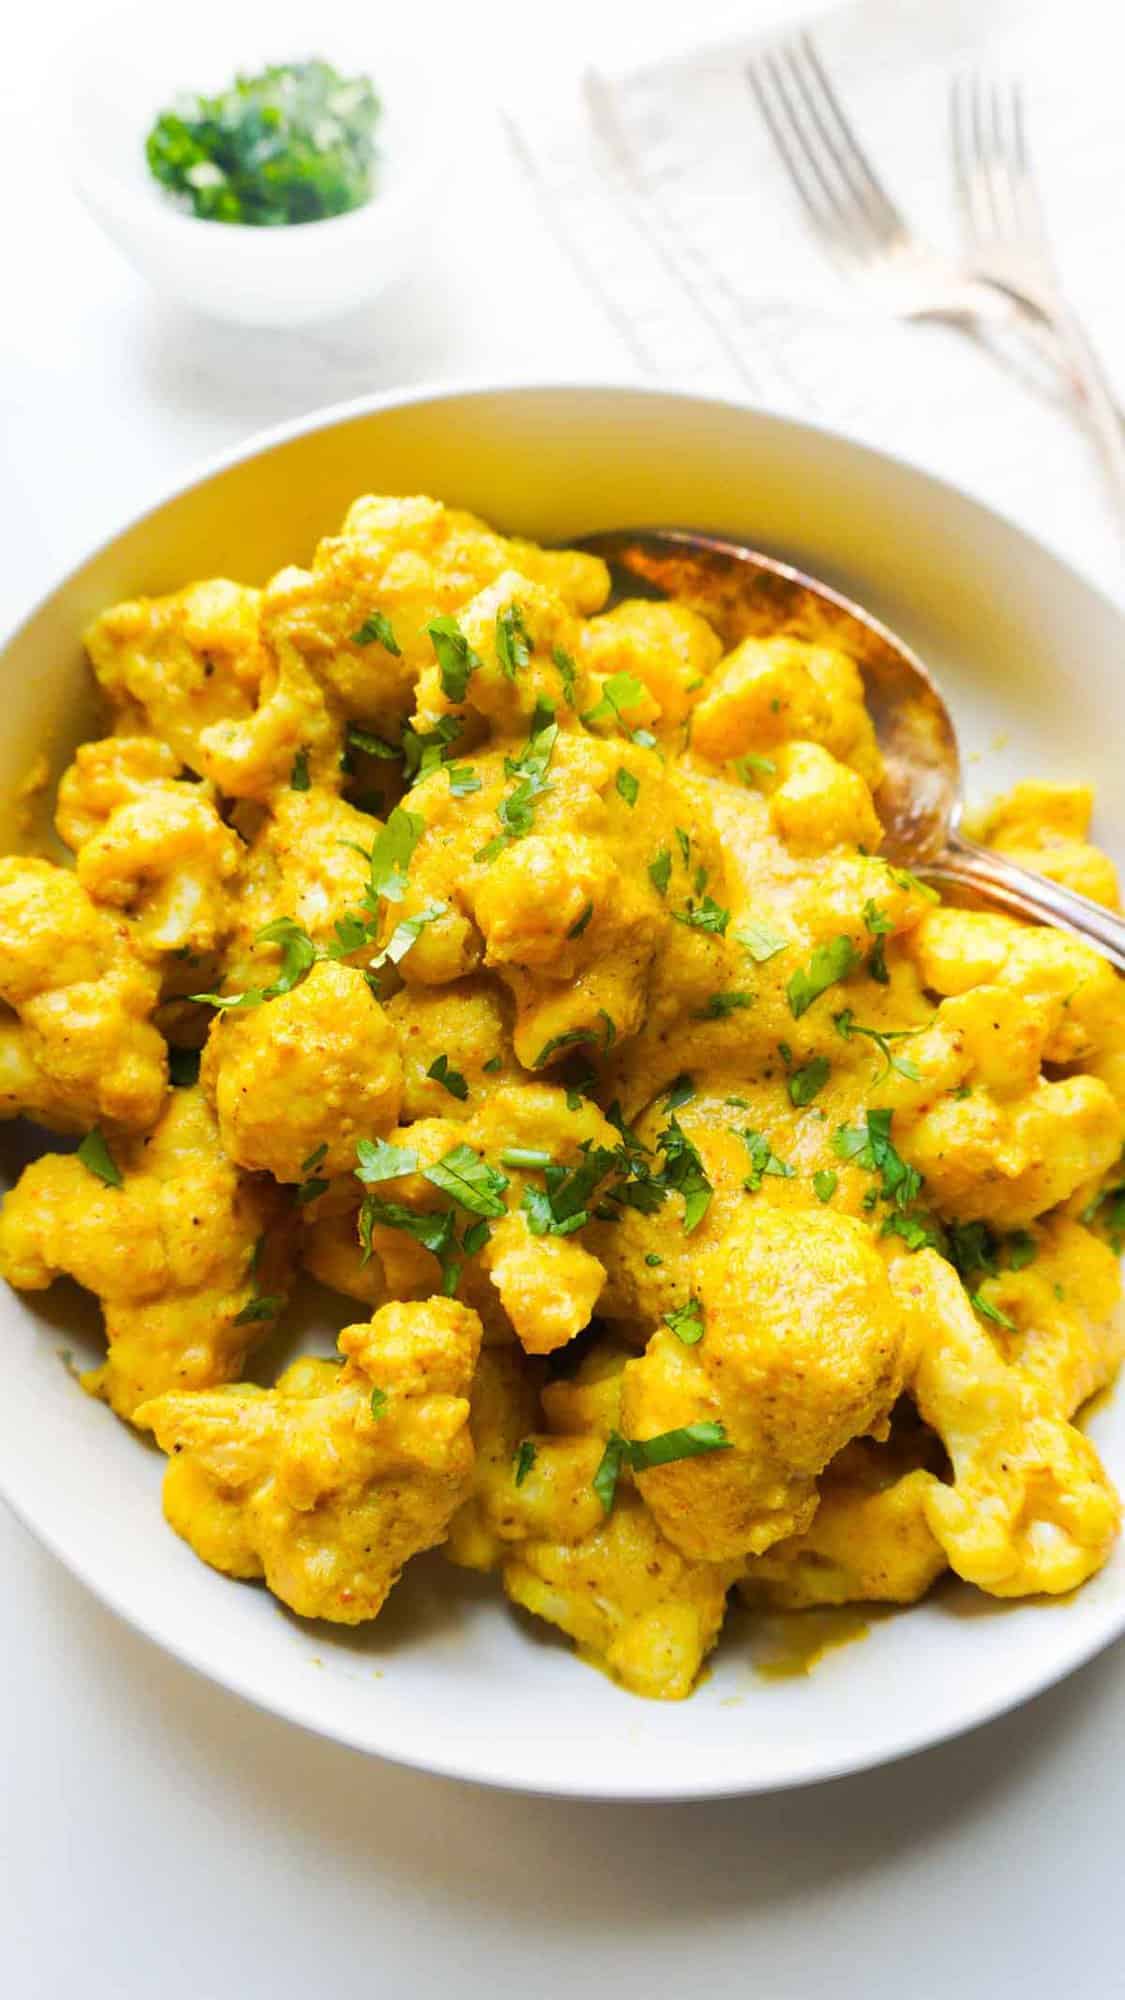
What is Hariyali Chicken Curry?
Hariyali literally means greenery. The curry then is a Pakistani or Indian green chicken curry. In my mom’s recipe the greenery is simply made up of cilantro and green chili. Most traditional hariyali chicken curry recipes contain mint but I have left it out intentionally because that’s just the way I ate it growing up. But, if you must add some, a handful of mint should do. Adding more will just overpower the curry since mint has a sharper, stronger taste than cilantro.
A Quick Look at the Recipe
⏲️Ready In: 30 minutes.
👪Serves: 4.
🍽 Calories and Protein: 424 kcal + 24g protein.
📋 Main Ingredients: Chicken, yogurt, peanut butter, aromatics, spices, lemon, cilantro, green chili, and oil.
📖 Dietary Notes: Wholesome and protein-rich.
⭐ Why You’ll Love It: Perfect to meal prep and enjoy throughout the week- just like my mince curry.
Summarize & Save This Content With AI
“We love this recipe and it's so quick and easy to make which is a must as a working mom. This is a family favorite and regularly in rotation in our home!” Sameera
Jump to:
Ingredient Notes
Onion: White or yellow, roughly chopped. The best part is, you don’t need to chop or fry it separately.
Cilantro: Stems and leaves.
Green chili pepper: Serrano peppers are a good choice if you want the curry to have medium heat. You can use Thai peppers for a spicier curry (like I did when I made my Pakistani chicken karahi) or jalapenos for a milder one.
Yogurt: I have used regular and Desi store-bought yogurt with similar results. Desi yogurt has a stronger tang.
Garlic: If using pre-minced garlic instead of cloves, add 1 teaspoon to the blender. 1 medium-sized clove of garlic is roughly 1/2 teaspoon of minced garlic.
Whole cumin: Raw, no need to roast this.
Salt: I use Himalayan pink salt, which is more nutrient-dense than table salt and has a different strength. Adjust the taste to your liking.
Almond butter: For the creaminess. You can also use peanut butter, as the original recipe calls for, but I have substituted almond butter because of peanut allergies.
Variations
- Don’t want to use almond or peanut butter? Coconut milk can be a great alternative to thicken the curry slightly and lend it creaminess. I use it for my tandoori chicken curry, and you can’t even tell there’s coconut in there.
- To bulk up the curry and make it more protein-rich, halve a few hard-boiled eggs and add them to the curry towards the end.
Watch How to Make it
How to Make Hariyali Chicken Curry
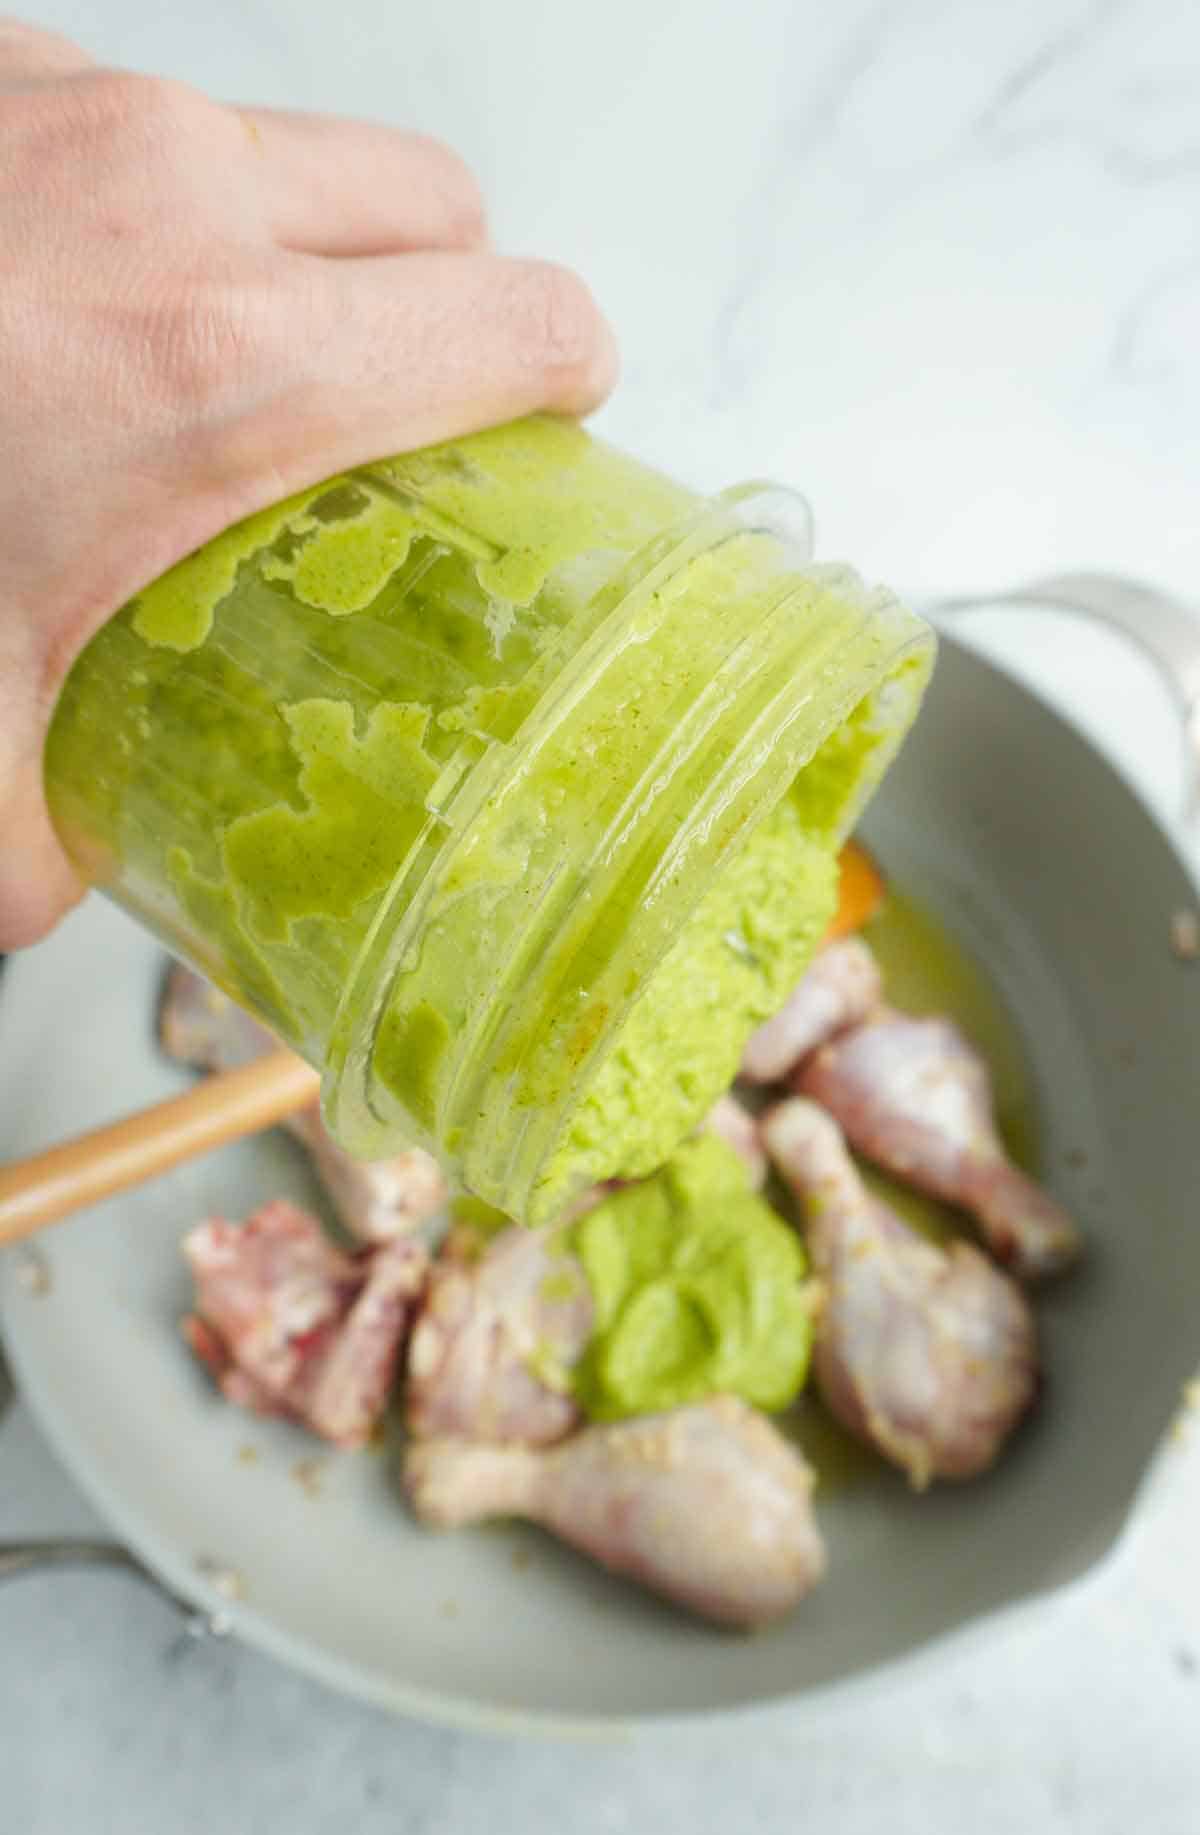
Step 1: Combine the sauce ingredients in a high-speed blender and blend until smooth.
Step 2: Heat the oil in a pan over medium heat, then sauté the minced garlic. Add in the chicken and cook for a minute.
Next, add the prepared green sauce.
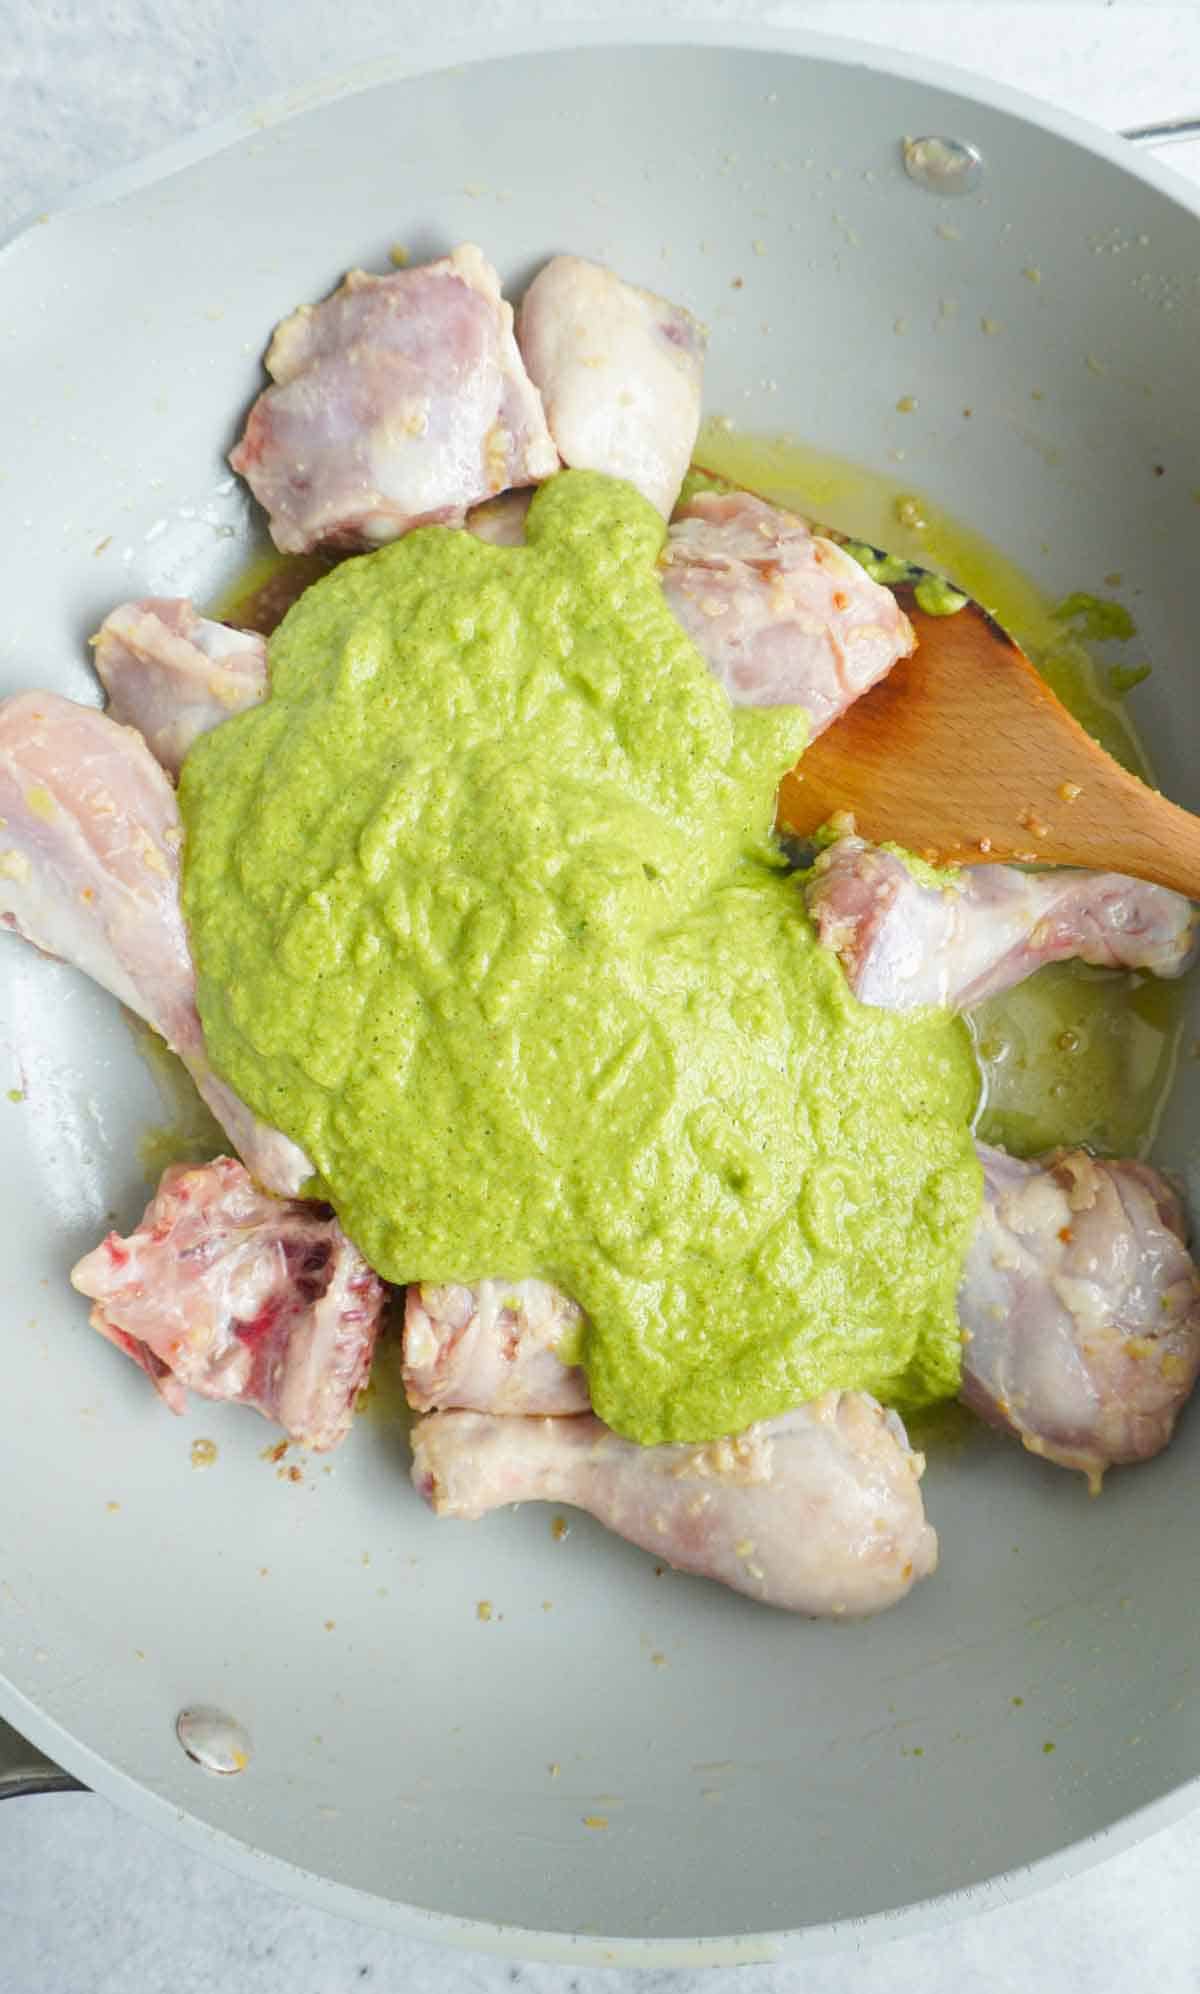
Step 3: Give it a quick mix, then turn down the heat. Cook for about 20 minutes, until the curry thickens.
Take off the heat.

Step 4 (Optional): Heat oil in a small pan and add cumin, red chilies, and curry leaves, and let them splutter. Pour it over the curry, cover, and let it sit for 2-3 minutes before serving.
Pro Tips
- Use chicken legs and thighs for the juiciest, most succulent meat.
- Sear the chicken on high heat until it gets a bit of golden-brown char on the outside.
- To speed up the blending, roughly chop the onion before blending.
- I like the curry to be saucy, which is why I cooked it with the lid on. If you prefer a slightly thicker consistency, cover it with the lid, leaving it off to allow the liquid to evaporate.
- To lend the curry a smoky flavor, place a piece of hot coal in the middle of a foil tent, drizzle a bit of oil, and cover the pan for 5 minutes. I do this sometimes when I make my one-pan tandoori chicken tikka, too, and it turned out insanely delicious.

Hariyali Chicken Curry FAQs
Transfer the leftover Hariyali chicken curry to an airtight container and refrigerate for up to 3 days. This curry is meal-prep-friendly and can be cooked and frozen for up to 3 months. Remember to use a freezer-safe container or bag if you’re doing that.
To reheat the chicken curry, thaw it overnight in the refrigerator, then heat it in a pan over medium heat.
Yes! You can also make just the base sauce and refrigerate or freeze it for later use. I have recently started making curry-based sauces for my meal prep, and during the week, all I have to do is think of the protein to cook it with! Watch me make a similar curry sauce on YouTube.
Traditionally, the curry is paired with roti, naan, or white rice. I personally love teaming it up with some mint lassi and a side of kachumber salad to make it more wholesome.
More Curry Recipes

If you tried this Hariyali chicken curry recipe or any other recipe on my blog, please leave a 🌟 star rating and let me know how it went in the 📝 comments. I love hearing from you! You can also follow me on Pinterest or subscribe to our newsletter to get more deliciousness straight to your inbox!

Hariyali Chicken Curry| Hara Masala Chicken| Green Chicken Curry
Equipment
- 1 medium pan
Ingredients
For the sauce
- 1 medium onion roughly chopped
- 1 Serrano pepper roughly chopped * see note 1
- 1 cup loosely packed cilantro stems and leaves
- 1 teaspoon whole cumin
- 2 cloves garlic or 1 teaspoon minced garlic
- 2 tablespoons yogurt
- 1 tablespoon almond butter * see note 2
- 1 1/2 teaspoons salt or to taste
For the chicken
- 3 tablespoons oil
- 1 teaspoon minced garlic
- 2 pounds chicken legs and thighs skinless, cut up into 12 pieces
For the tempering (optional but highly recommended)
- 1 teaspoon whole cumin
- 5 dried red chilies
- 2 sprigs curry leaves
For the garnish
- 1/2 lemon for drizzling
- cilantro leaves or chopped fine
- roasted cumin powder or garam masala
Instructions
- Blend the onion, green chili, garlic, cilantro, whole cumin, yogurt, almond butter and salt together till a thick sauce is formed and everything is thoroughly combined. Set aside.
- In a pan, pour oil and saute the minced garlic on high heat for 30 seconds.
- Add the chicken and saute the chicken till it gets nicely coated and changes color, about 2 minutes.
- Add the hara masala and toss to evenly coat the chicken. Cover and leave to cook on low heat for about 20 minutes.
- Uncover and on high heat dry out any excess water. Once the oil rises to the top and you get the consistency of the curry to your liking, turn off the heat.
- Lastly, In a pan, on high heat, saute the curry leaves, whole cumin and dried red chilies for about a minute. Pour the tempered oil onto the chicken and cover the pan.
- Let the chicken get infused by the tempered oil for about 2 minutes and then garnish enjoy!
Video
Notes
- You can use a milder pepper like Jalapeno or a hotter one like Thai, but I find Serrano to be a good in-between.
- If you only have Serrano and want it spicier, add a 1/2 or whole additional pepper.
- The original recipe calls for peanut butter, but since my son is allergic to peanuts, I use almond butter here and even sometimes whole raw cashews.
- If you do decide to use cashews, presoak 1/4 cup in some water for about 30 minutes before blending them with the rest of the ingredients.
Shah Zeeshan says
A hearty and refreshing curry and perfect for a quick and easy meal on weeknights!
Sameera says
We love this recipe and it’s so quick and easy to make which is a must as a working mom. This is a family favorite and regularly in rotation in our home!
Zeeshan says
I’m so happy you and your family enjoy this recipe! Thank you so much for the review Sameera!