How do you create a functional and cost-effective pantry? Well, you look beyond the Pinterest boards and high-end stores! I absolutely love home organizing projects, but more than that, I love doing them without spending a ton. Below, I have a few tips that will help you create your own practical and budget-friendly pantry. Let’s get started!

WANT TO SAVE THIS RECIPE?
Start With A Clean Slate
So where do you start? This is really a no-brainer, but when you have a clean slate to work with, you welcome new ideas and inspiration.
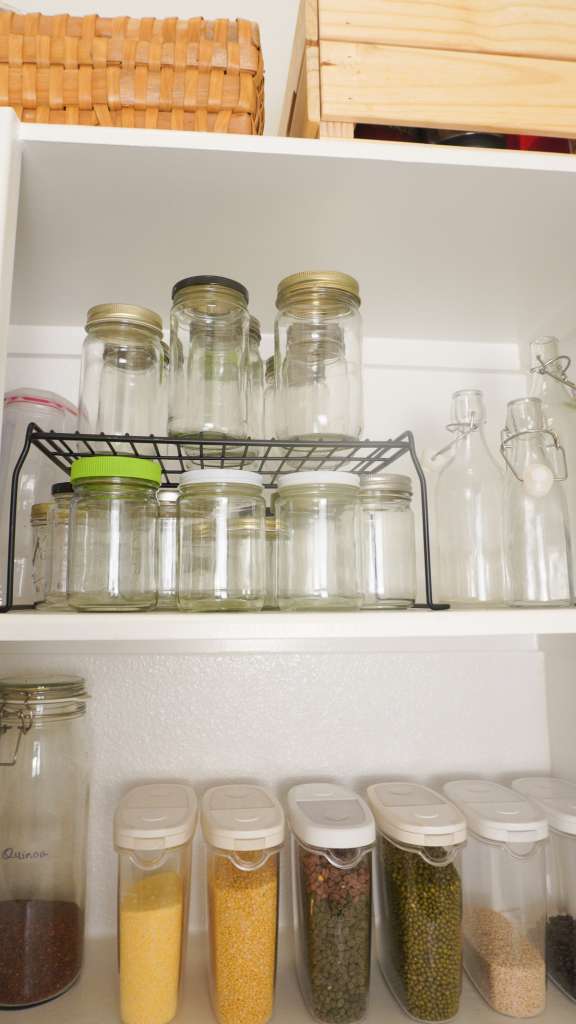
This is the perfect time to purge your pantry, too. I realized when I emptied my pantry that I was needlessly hoarding glass jars and bottles. I like to be frugal where I can, so to me, it was more cost-effective to repurpose old mayonnaise and almond butter jars (plus they’re the perfect size for meal-prepping Chia Oat Cereal). However, honestly, how many does one really need? And so I got rid of many of them and only kept the few I use regularly.
Emptying your space also gives you room to plan out placement for the various storage containers you want to bring in, as my friend Naveen of The Design Souk reminded me. She also has a fabulous pantry makeover on her blog that you’ll want to check out!
I truly wanted my pantry to be realistic, functional, and suitable for my lifestyle and not just a pretty Pinterest pin.
Group Like Items
So once you’ve emptied your pantry, group like items together. I grouped all my flour and grains. My nuts and seeds were grouped separately, and snacks and party supplies had their own group.
This gives you an idea of how many different categories you will need to fit into your pantry, as well as the type of containers you will need. For example, after grouping all my rice, I realized I would need a large number of jars (I use Basmati, Sushi rice, brown rice, wild rice, and ready-made packets of brown rice and quinoa for quick meals) and a fairly large one for the white Basmati. Instead, I opted for a large, clear bin where I could store all the rice bags together. I labeled the bin and called it a day. I may or may not change that in the future.
Recycle What You Have
And here’s how the cost-effectiveness comes in. I tried to keep costs down by using what I already had, like my glass jars. I have collected them over the years from Ikea and Homegoods, among other stores. It was tempting to go out and buy the latest acacia-topped jars, but my glass jars are working just fine for me, so I kept those and instead opted to splurge on nesting baskets. I ditched my mismatched trays because they were no longer serving their purpose. After all, we were aiming for functionality as well!
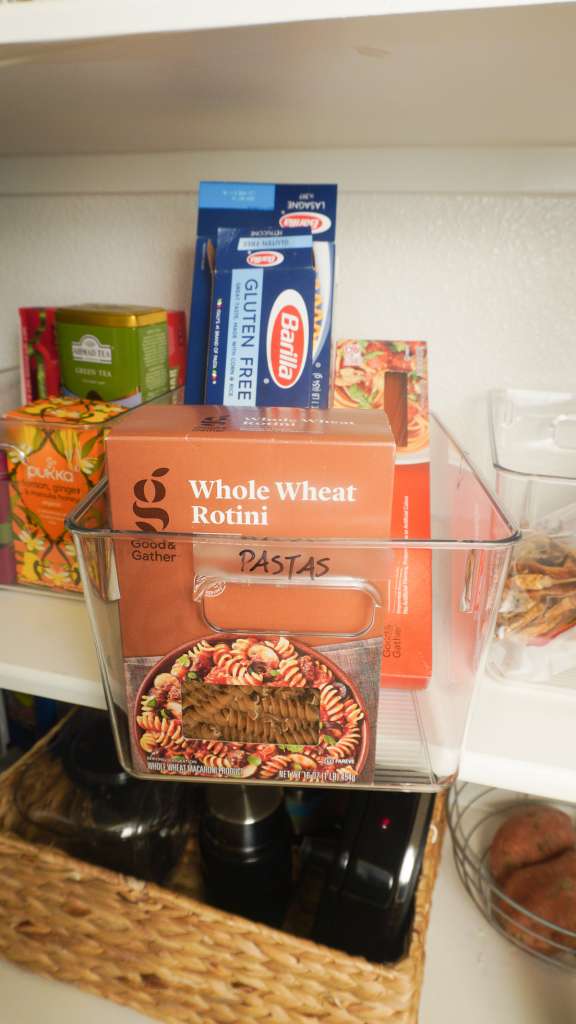
Get Bins For All Packaged Items.
This time around, I wanted uniformity to achieve a more streamlined look in the pantry. I wanted beauty, but also wanted to keep the pantry makeover within my budget, so even though baskets would have been great, I opted for clear bins instead. And it was better, as it turns out, the clear bins are:
- Better for seeing when stocks are low
- Easier for kids to see what snacks are available at a glance
- Available at my favorite bargain store, HomeGoods, yay!
I have been obsessed with clear bins ever since binge-watching The Home Edit on Netflix, and I couldn’t be happier when I found similar ones at HomeGoods when out looking for storage. I got them in all sizes and store everything from baking supplies to bags of rice in them.
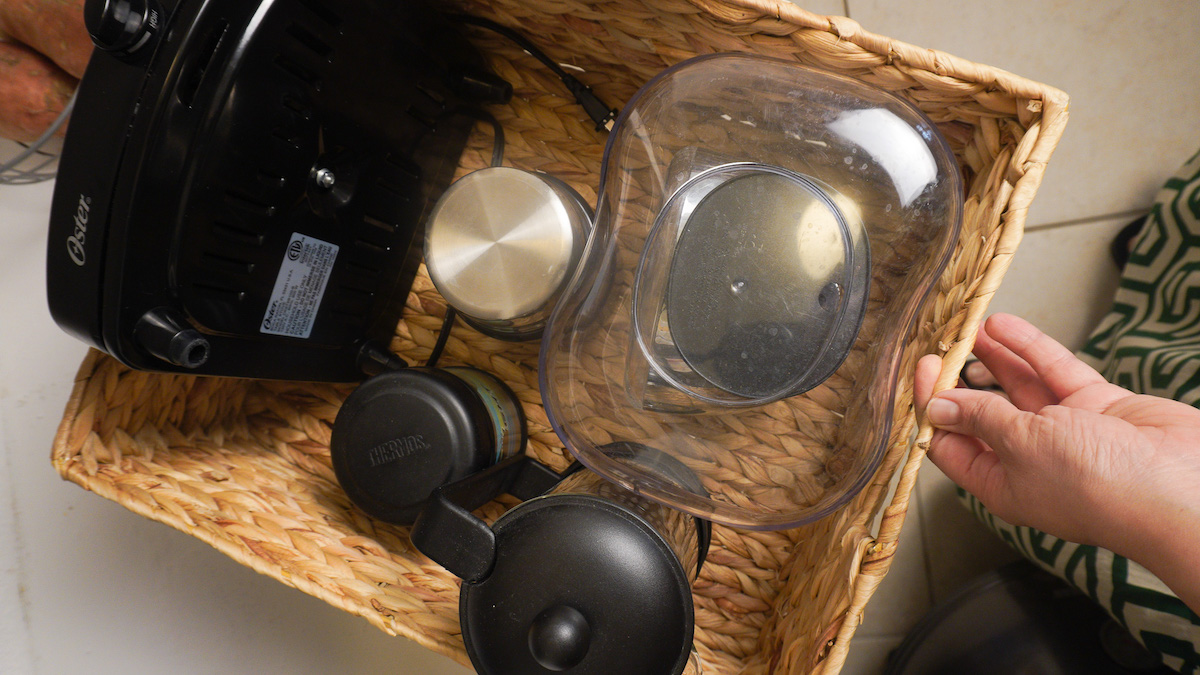
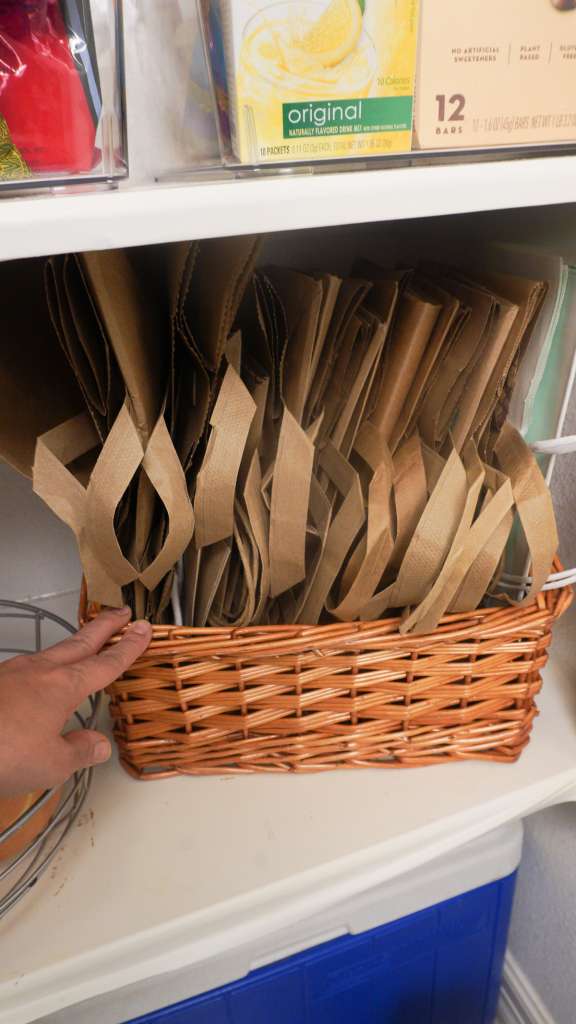
Hide All Miscellaneous Items in Baskets
On the other hand, I wanted to hide miscellaneous items in baskets for a streamlined look. As such, I bought nesting baskets that now house party supplies, small appliances, and extra lunch boxes.

Look For Ways to Use Dead Spaces
I have hard-to-reach corners in my pantry that I need to use effectively. Previously, I had been storing various items there and had a hard time accessing them. This time around, I placed turntables to make it easier to access. I store bottles of different extracts, honey, and backstock oils on them.
On another shelf, another lazy Susan houses all my specialty teas and coffees.
Want to purge your pantry of toxins? Download my guide!
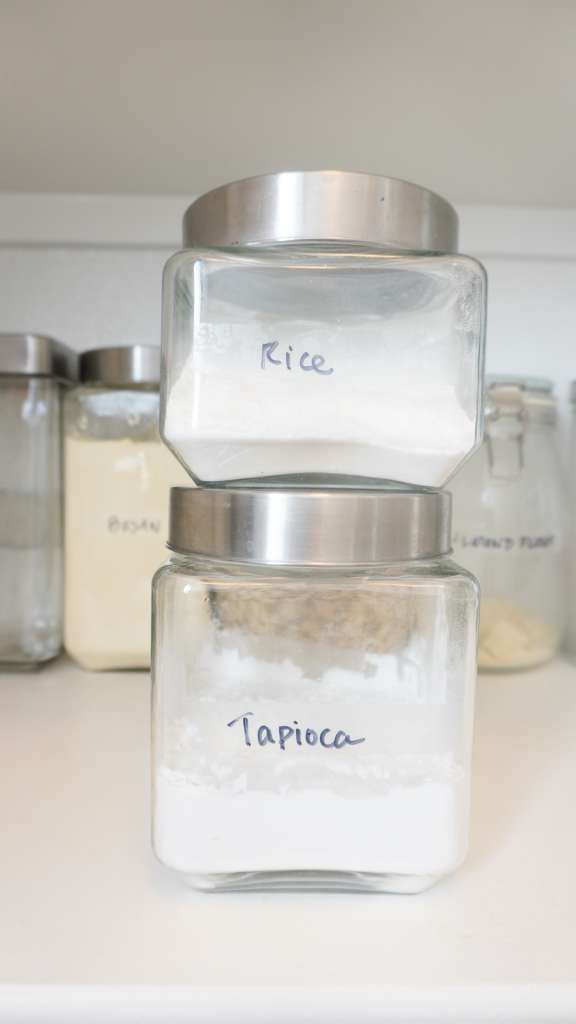
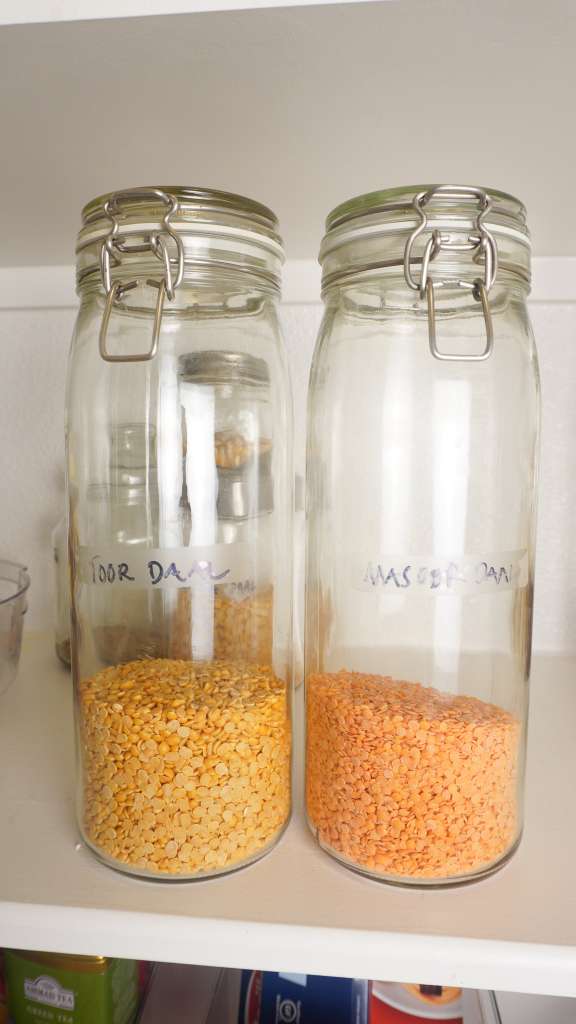
Use Glass Versus Plastic
I have been using glass jars to store my grains, nuts, seeds, and lentils for a while now, and can’t tell you how happy I am with them. They are functional, much like the clear bins, in that I know when stock is running low and add to the beauty and streamlined look of my pantry. They are also better than plastic containers which often contain BPA (bisphenol A) an industrial chemical used to make plastic and an endocrine disruptor. If you’re interested in learning more about toxins in our food, be sure to check out my Pantry Detox Guide. I show you how to purge your pantry of toxins and restock it with nutrient-dense foods. I also share some of my favorite home and skin care products.
Think of Practicality When Labeling Containers
I have explored various styles of labels. There were the simple white tags (not very attractive) and the chalkboard stickers (which would be easily erased by handling). And finally, I bought clear stickers I could write on with a black Sharpie. Because I wanted to save money where I could, I just used the clear ones left over from the last change-out. They helped tie the clear bins with my glass jars and saved me from re-labelling everything in the pantry.
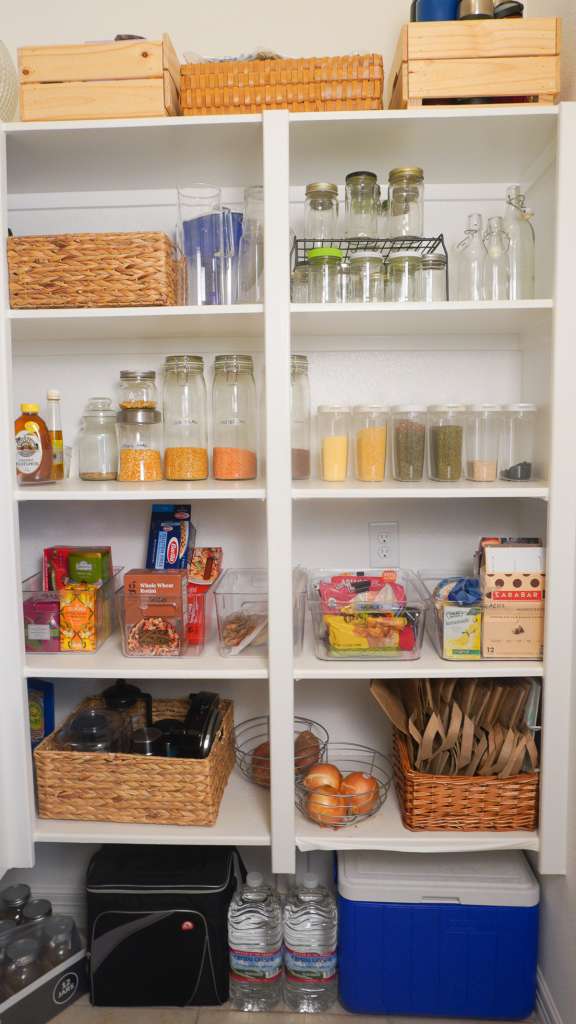
Place items according to their use.
My topmost shelf is the perfect place to house party supplies, flower vases, percolators, punch bowls, and other seasonal items.
The next shelf down is where I have placed my repurposed glass jars and bottles, jugs, and other party supplies, as well as our home medicine and first aid kit.
On the middle shelf, I have all the lentils, beans, grains, nuts, and seeds.
The shelf at eye level holds all our snacks, baking supplies, packaged goods, and backstock of spices, teas, and other items.
The bottom shelf holds onions and potatoes, as well as various appliances and paper products.
On the floor, I have my indoor grill, coolers, and bottled water for emergencies.
And that’s it! My realistic, cost-effective, and functional pantry! I hope you found these tips helpful and can implement them into your own pantry makeover. Check out the before and after in my video!
Leave a Reply